Each client can get access to a portal where they can login, view the recent calls and messages, update a status, update the task manager, listen to call recordings (optional), and update information such as contacts, resources, and the on-call schedule.
However, it’s entirely up to you if you wish to give them access to this portal.
Giving Access and Creating New Users
When an account is setup, a client account is automatically created based on the email and password generated during the client wizard. To give clients access, you’ll need to create an email for them with the login details. They’ll login to the same website you would, except with their own credentials. The email address for login will be the CLIENT EMAIL you used when you setup the account.
Example:
Hi James, here are your login credentials below for accessing our TAS portal to view or update your important information.
Login URL: https://79273.tas.evs7.com/
User ID: james@pepsicola.com
Password: Cn6~Tc8|Mr0=Rv5
To change the password for the client, you can click the 3 dots as seen below.

Then click Change Password. You may auto-generate a strong password.
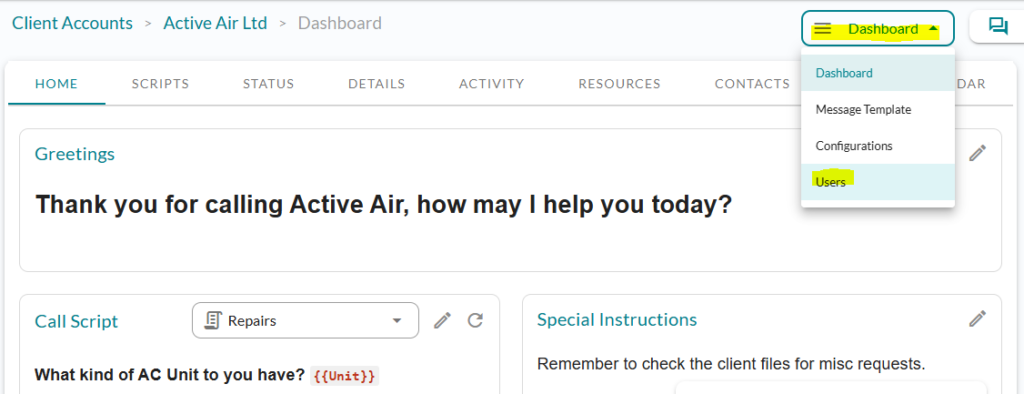
To create a new user, head to the client area in the admin portal. Then click on the drop-down menu and select Users.
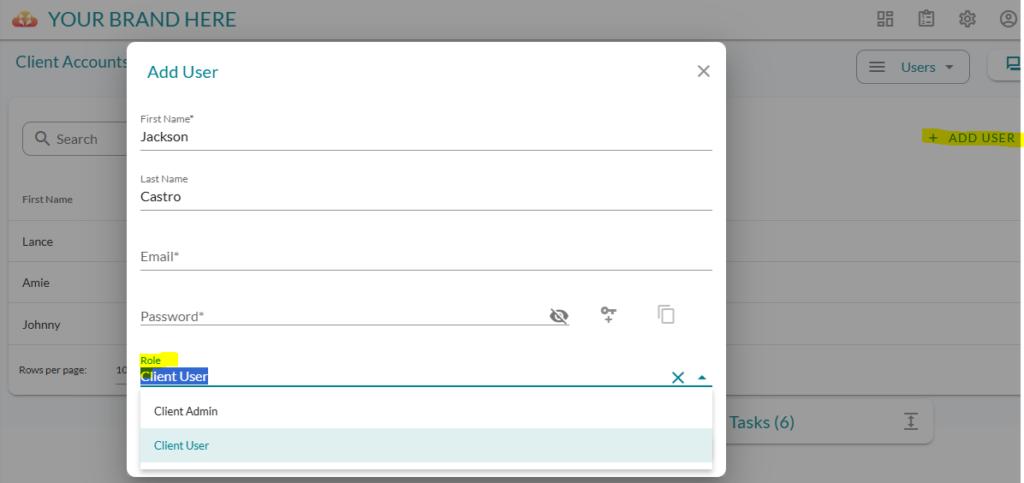
There are two different types of client users:
- Client Admin – This type of user will have complete access to view all calls and activity on the account along with updating any information.
- Client User – This user will be limited to see only calls and messages for him or herself. This user will need to verify SMS and/or email before being able to access.
Logging in as the Client
To simulate a login as a client admin, navigate to the Client Accounts section of your admin portal. If you hover over the client, you’ll see an icon that says “Login as User.”
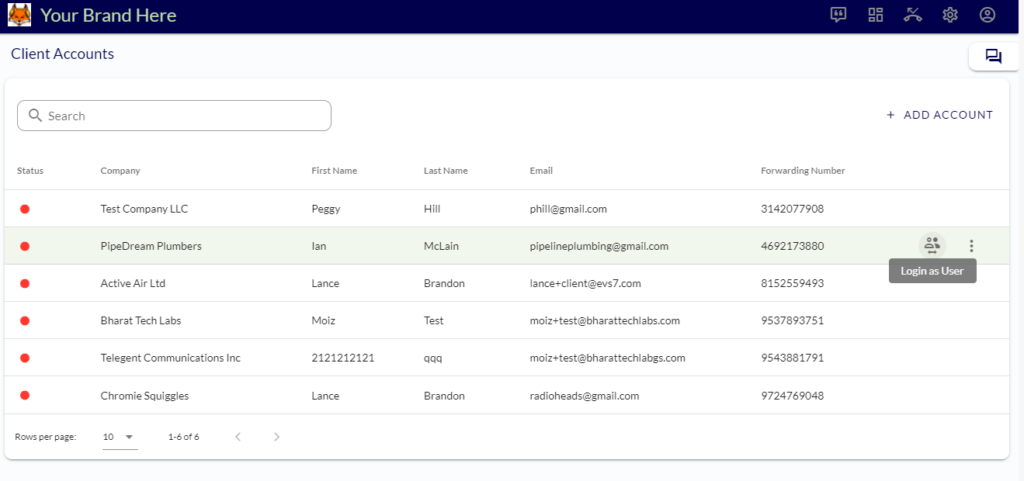
If you click on that, you’ll be able to view what the client would see when they login.
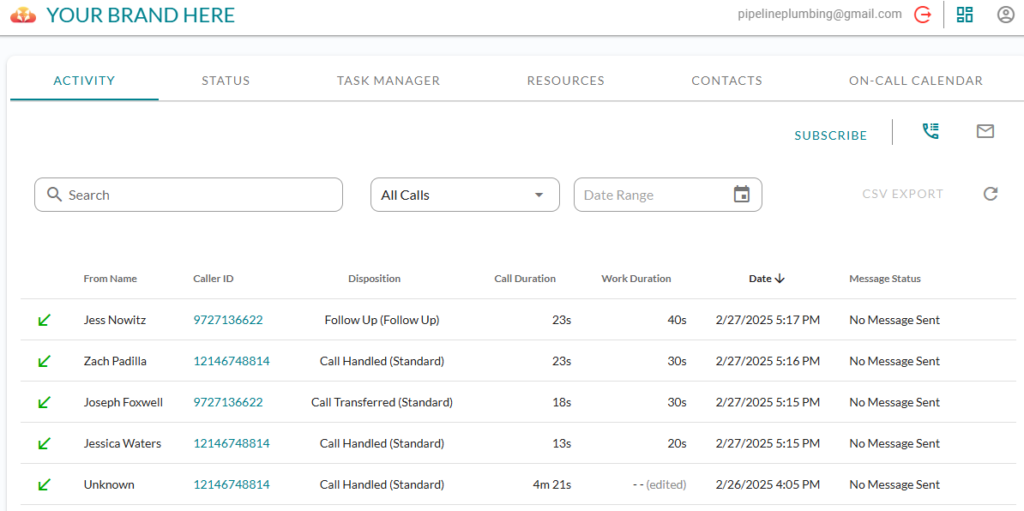
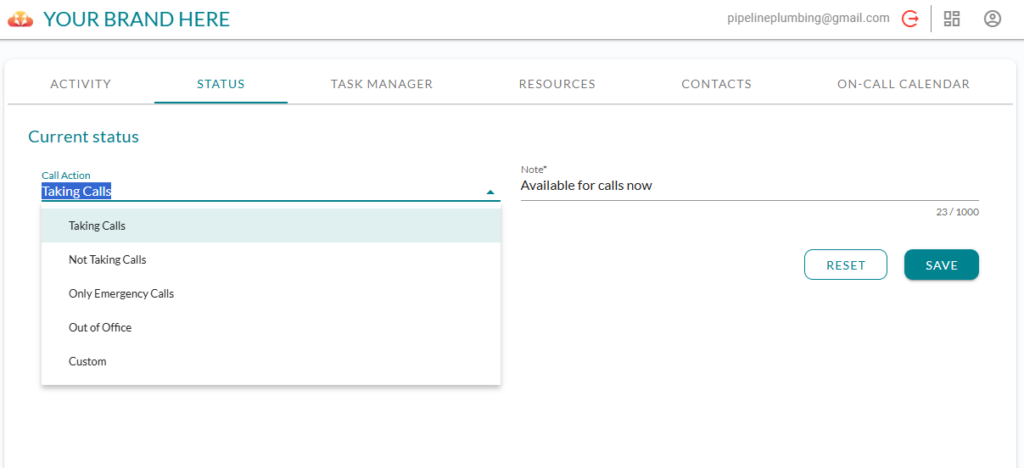
The client will also have the ability to update a “Status” that can act as real time information for the operators with specific data or instructions.
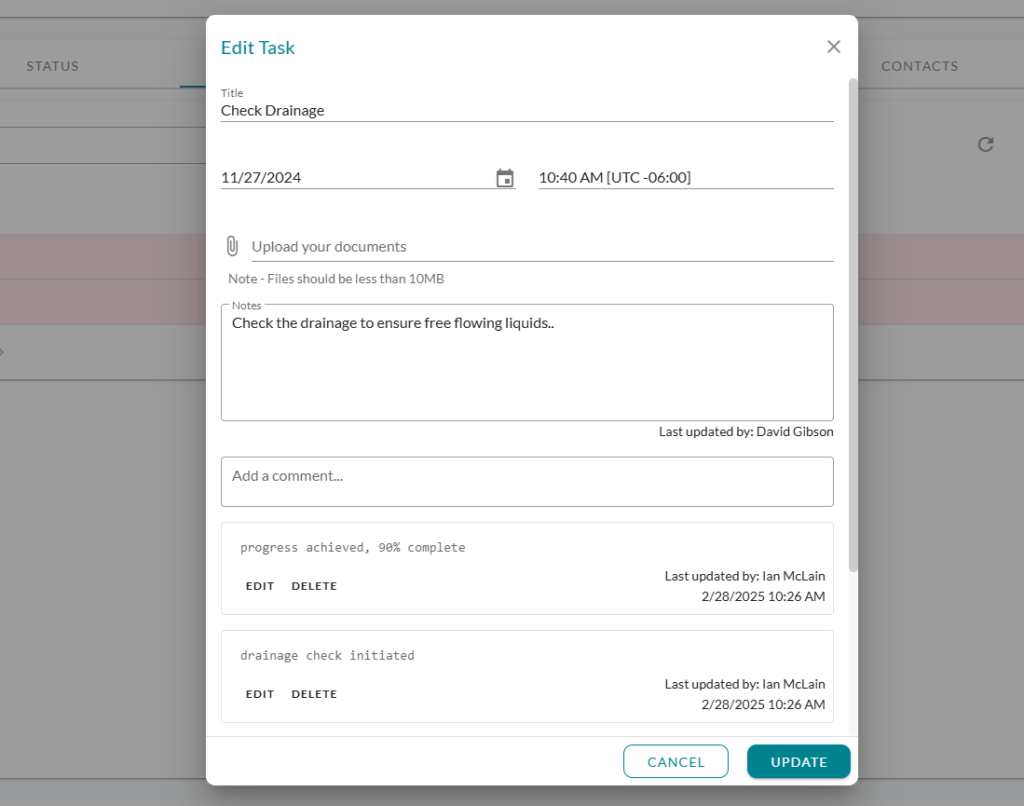
Client Admins will also have access to create new tasks.
Client Admins will also be able to update Resources, Contacts, and the On-Call Calendar.

