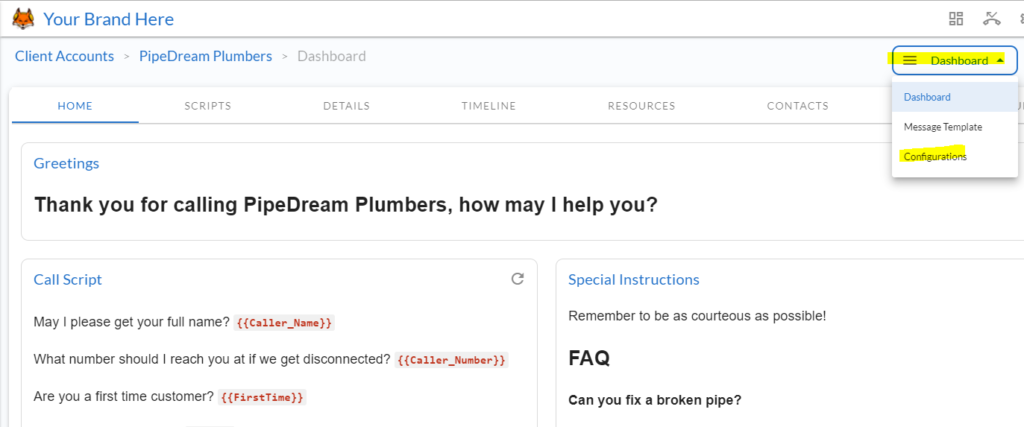
To access Client Account Configurations, open the client you wish to configure, then click the drop down menu and select Configurations.
Calling Configurations
Calling configurations allow you edit settings related to how the calls are received or made on a per client basis.
Auto Answer: When enabled, auto answer means that agents will automatically receive calls rather than having to “click” to accept the call. They will hear a BEEP to alert them that a call is now live. This only happens if an agent is “available” and not currently on another call. If an agent is currently on a live call, they can still put the caller on hold and click to accept a second call.
Forwarding Number: This number determines how the client account receives calls. The forwarding number should be given to the client to forward their calls to when you are ready to receive calls on their behalf. You may update this number to another available DID using the drop down, but be sure to inform the client if you make a change here. This will also be referred to as the Account Number.
Outbound Caller ID: When placing an outbound call on this account, this will determine the number displayed on the caller ID. We recommend using the forwarding number here so if someone call’s back you can receive the call live under the correct account, but you may use any 10 digit number you wish (such as the client’s own number). Due to recent FCC Shaken/Stir regulations, you may have to contact us to get your own custom number whitelisted if you experience any issues.

Email Configurations
Under the Email Configurations tab, you can choose the email you wish to use for this client. The default account will come from “messages@tascalls.com” but you may use your own “reply-to” address so if someone responds to your email, you can get it in your own inbox.
If you wish to add a custom email such as your own domain, you may do so in Settings –> SMTP Configurations.
Note that hosted mail servers like gmail and yahoo cannot be setup here via SMTP. You will have to use your gmail address under the reply-to email for the Default mail server.
Time Zone Preference
Select the time zone for your TAS.
Expect to see more and more configuration options show up here over time. We’ll do our best to keep this article updated as more options are added.
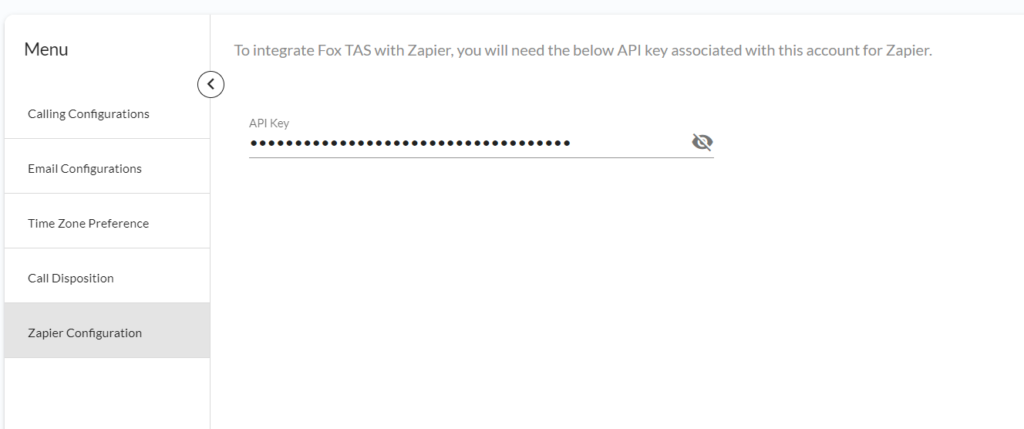
Zapier configuration
To integrate Fox TAS with Zapier
You can find the API key associated with this client account for Zapier here and use it with the Fox TAS’s Zapier integration.
To ensure the successful creation of a zap, it is recommended to generate a trial call for the corresponding account and populate all script fields with placeholder values that you desire to see in Zapier.