Adding scheduled messages can be important for certain clients workflows. For example, a contractor may want all their messages to be held until 8am when they’re ready to start their day.
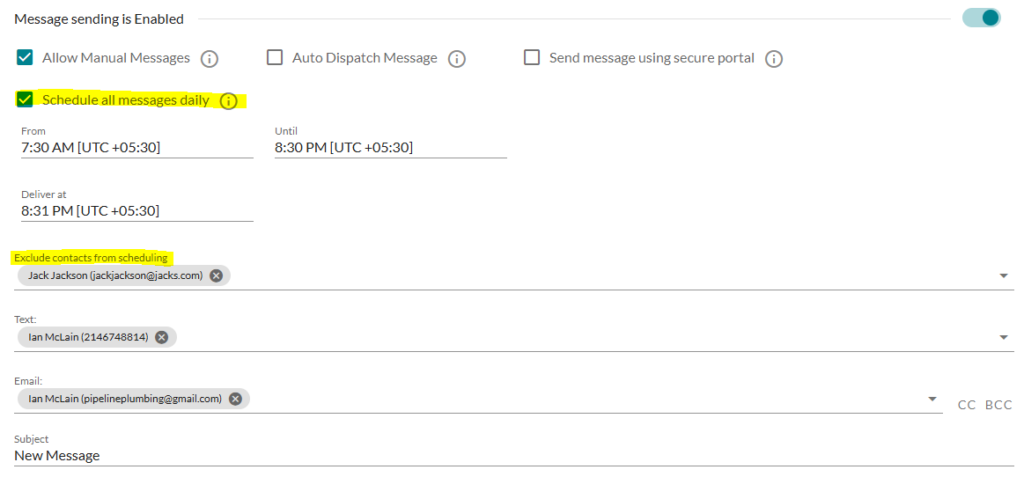
Let’s take a look at the options for setting up scheduled messages. Navigate to the default Message Template on the client you wish to schedule messages for. In the below example, messages will be held from 730AM until 830PM and will then all be delivered at 831PM.
However, we’ve excluded Jack Jackson from this schedule since he always wants his messages immediately.
In addition, you’ll be able to customize different delivery times based on the unique script block if you choose to do so. Simply edit the script block and scroll down to the custom message template. Then you can select Override message scheduling for this script block.
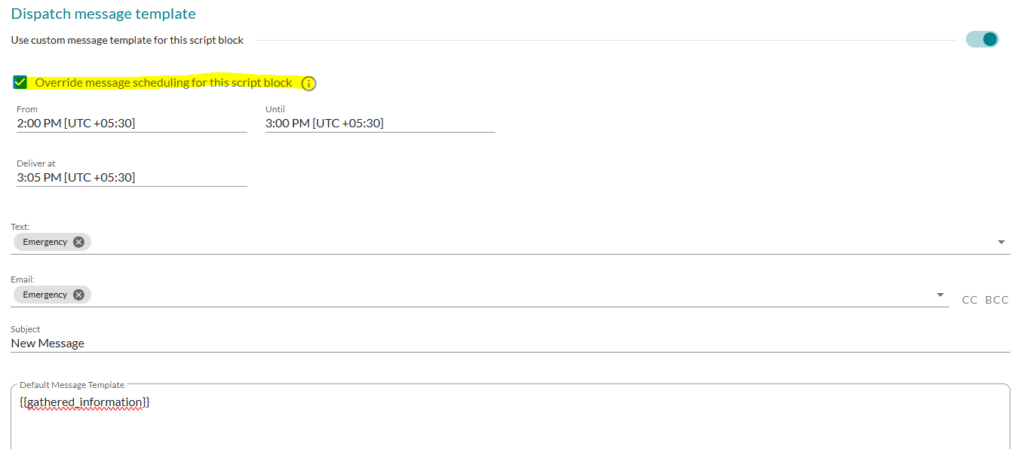
Now, this custom schedule for this script block will take priority over the default message template schedule.
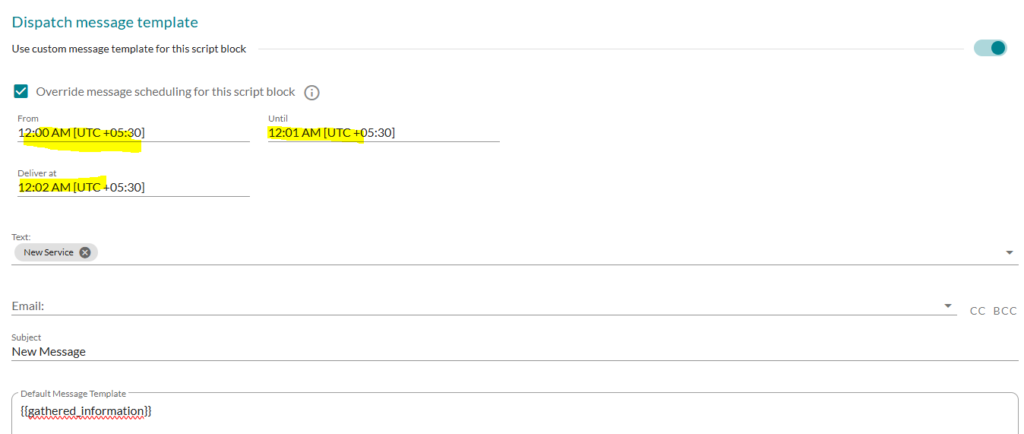
Lastly, let’s discuss the scenario in which you need to have a default schedule for messages in place, but there is a custom script block that you need messages sent immediately. The simplest way to do this, is to turn on the override message scheduling for the custom script block you want. Then just set it for midnight and for 1 minute. This effectively acts as sending immediate messages while the scheduling is still enabled for the rest of your script blocks.