In this tutorial, we’ll explain how to send a message using the agent portal.
Bringing Up the Message Box Window
In order to send a message, you must first have a live call open.
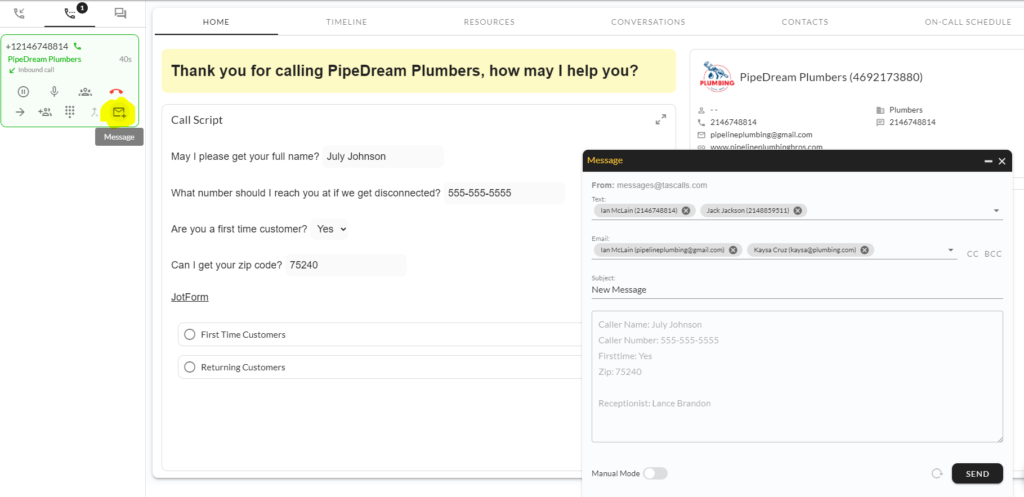
Select the Mail icon located on the live call card on the left of your screen. This will bring up the Message window and show who/what will be sent. In this example, it’s going to be sending a text message to both Ian and Jack. It’s also going to email Ian and Kaysa.
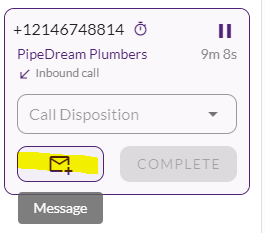
You can also bring up the Message box after the call is ended:
Updating Message Contacts
To add or remove contacts from Text or Email, you can click the box next to the contacts to bring up a drop down showing all available contacts to choose from.
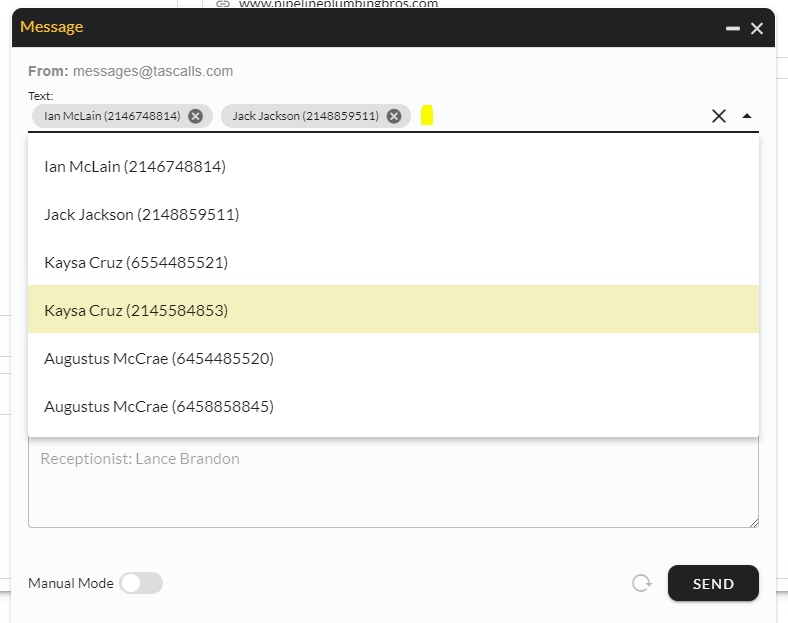
Keep in mind that the contacts may change depending on which script you’re on if the manager has programmed it such. Or it may change based on who is on the on-call schedule currently. You should only change contacts if your manager has instructed you to do so.
Updating Message Content
In most scenarios, the message content will automatically update based on information you type in the script fields so there will be no need to update the message content.
However, in some cases it may be necessary. Click the toggle button on Manual Mode to enable editing.
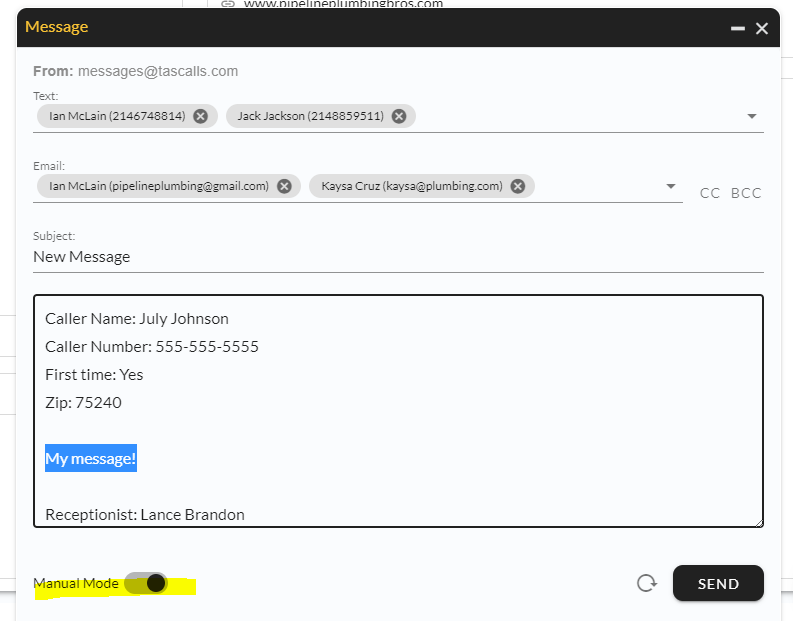
Now you can edit the Message accordingly. Now you can click Send to deliver your Message.
Alternatively, if the Message is grayed out it means the manager has set it to Auto-Dispatch, meaning you won’t have a chance to edit or see the message and it will be automatically sent.