Adding a new client account is simple. This can be a test client or you can start the setup process for one of your real clients. Before going live with a real client, you’ll need to make sure your client’s phone number is forwarding to the number assigned so the Fox can start receiving calls on their behalf. In order to create a client, you’ll have to have an available Forwarding DID. If you need more, please contact support or sales.
New Client Wizard
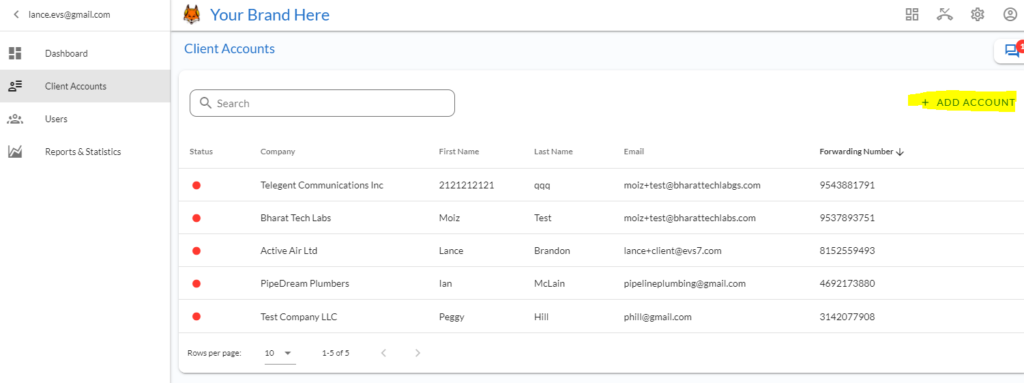
Step 1. On the left-hand side of the page, click on Client Accounts. Then mouse over to Add Account on the top right of the page.
Step 2. First, add the client details.
- Type in the client’s first name, last name, email, password, and company name. Keep in mind that the email and password will be used by the client to login in to their portal (if you allow them to have access). You can always change the password later.
- Forwarding Number – Select an available DID number that will become the inbound number tied to this client. Setting this up allows you to receive inbound calls from your client customers. Your client must forward their inbound number to this number when they’re ready to go live so you can receive the calls for them.
Step 3. The third step is to add the primary contact details. This will act as the default contact at the client for messages and transfers. You can always change this later. Check the Use the Client’s Name and Email to auto-fill info from client details. Leave the check box empty if you want to add different contact info.
Step 4. The next step is to add the client’s Configurations.
- If you haven’t already setup your own SMTP credentials, you can use the default ones we provide for you, and simply put your email in the reply-to box.
- Select the client’s time zone.
- For the outbound caller ID you may use the default number on your account by leaving it blank. (Find the default number by clicking the gear icon at the top right of the page. Then select system settings and click on outbound caller ID to view the number.) You may also use the forwarding number as your caller ID if you like.
How to Edit the Greeting, Special Instructions & Call Script
Once you’re done with the wizard, you’ll find yourself on the Client Dashboard Home tab with options to edit Greeting and Special Instructions sections.
Greeting
Add the greeting by clicking on the pencil located to the right of the greetings box. You can insert variables such as the company name or agent name by clicking on the brackets below.
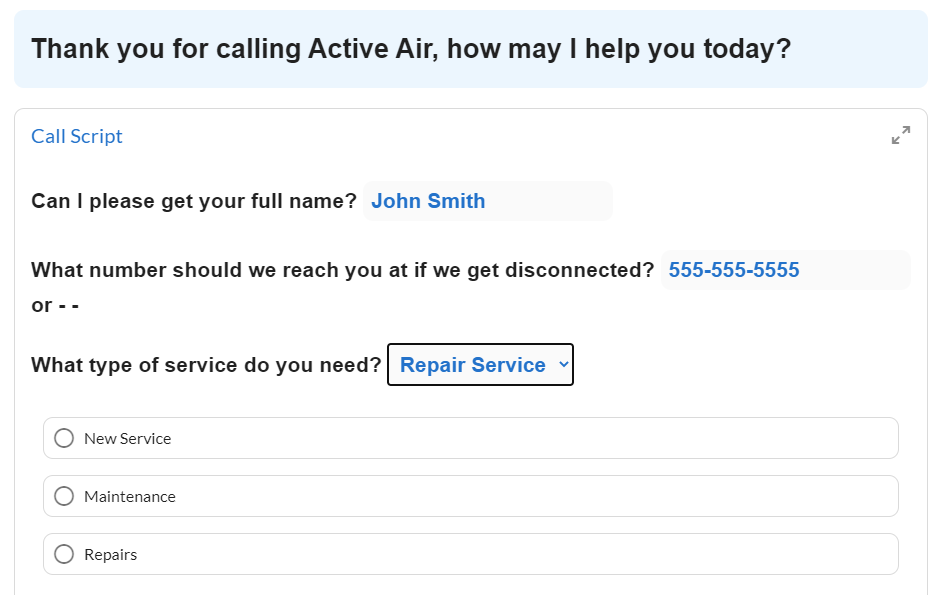
“Thank you for calling ABC Plumbing, this is Jennifer, how may I help you today?”
Special Instructions
Add the special instructions by clicking on the pencil located to the right of the box. You can insert variables such as the company name or agent name by clicking on the brackets below.
This is a place you can put any important information you want the operators to be able to see on a quick glance.
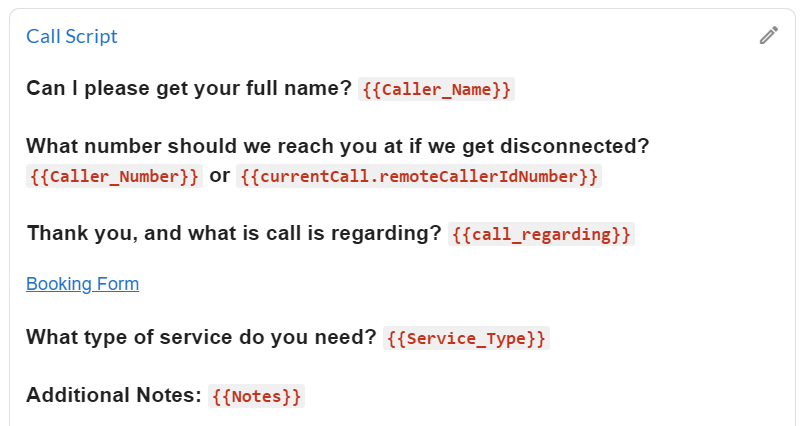
Call Script
You can view the default call script on the Home Tab, but to edit or add additional script blocks, you’ll need to navigate to the Scripts Tab. The calling script allows you to provide specifics on what you want your agents to say on behalf of each client as well as collect important information in fields that can be used in a Message or for reference later.
Fields are represented by brackets {{Field_Name}} and there are a number of default fields available.
You can also easily add new fields in the form of:
- Text field
- Text box
- Drop down menu
- Check box
For example, if you wanted to collect someone’s name, the first line of your script may look like this:
May I please get your full name? {{Caller_Name}}
Use the icons below to create new fields and copy and paste fields with brackets into your script. You can also insert variables or links to resources.

Scripting can be extremely powerful when you link script blocks together to create dynamic scripts and decision trees. This gives agents and customers a better and more flexible experience, especially for clients needing more complex assistance.
You can also insert transfer buttons in the script which will give you the option to include prioritized transfer groups so the agent will know who the call should be transferred to as well as what to do if the first choice doesn’t answer.
Visit the Dynamic Scripting tutorial for more info to setup complex scripts and logic!
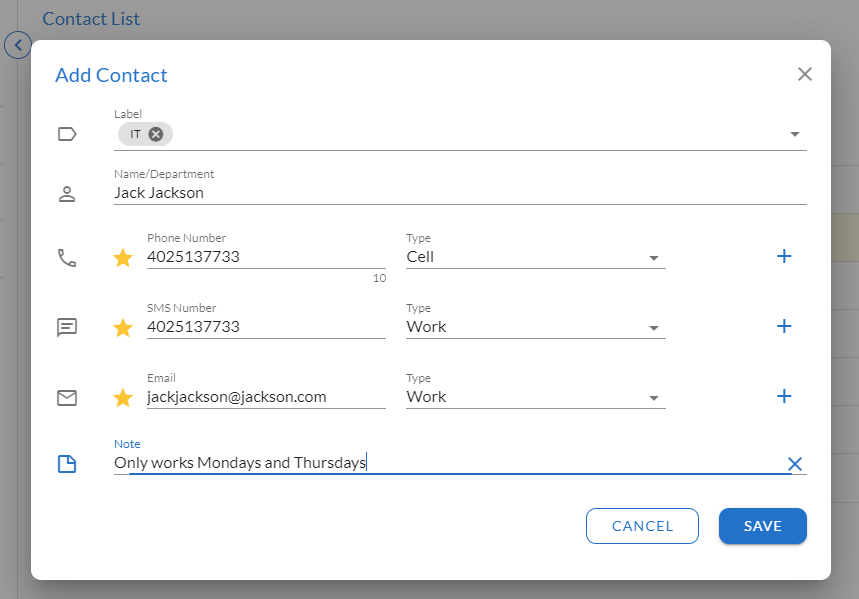
Adding a Contact
From the client screen, navigate to the Contacts tab. If you added one in your initial client setup, you’ll see your primary contact here. To add another contact, click the + Add Contact link on the right. You’ll have the option to include multiple phone numbers, sms numbers, and emails. The star indicates the primary method of contact.
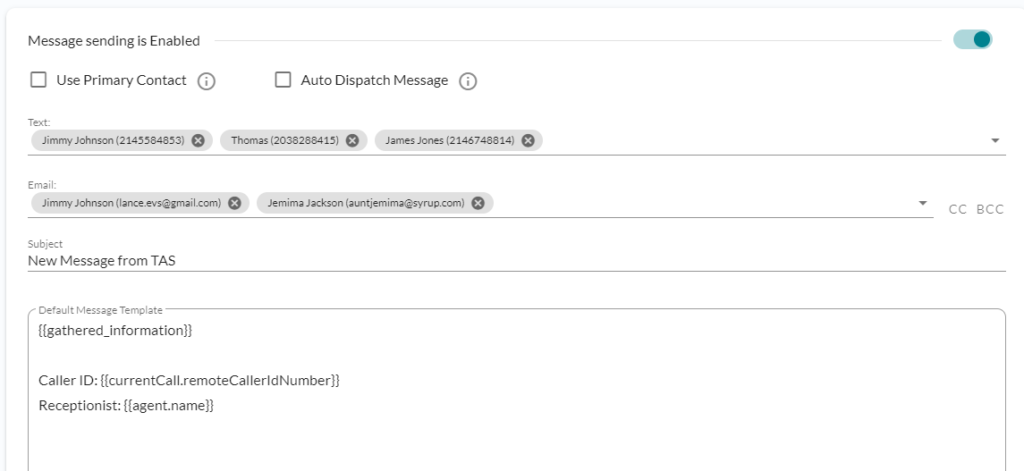
Updating the Message
The Message refers to the text or email sent to the client to inform them of the call.
To customize the message you can send to your client contacts, click the dropdown menu on the top right and select Message Template. To customize who receives the message by default, uncheck the “Use Primary Contact” box, and add or remove text and/or email contacts.

The agent will have a chance to add or remove contacts as well unless you select “Auto Dispatch Message,” which means it will be sent automatically without the agent even seeing it.
You can also disable the sending of messages completely for a particular client by updating the slider button on the top right of the screen.
By default, you’ll see a {{gathered_information}} tag in the message box. This grabs all completed fields in the script and puts them in the message for you in easy to read format. You can customize what the message says or add additional information as well here.
For advanced use cases, you’ll be able to customize a message on different script blocks as well.
Adding a Resource
Resources are embedded websites or files for agents to use while handling a call. You can link to resources from a script or the agent can click the Resources tab to view all available resources.
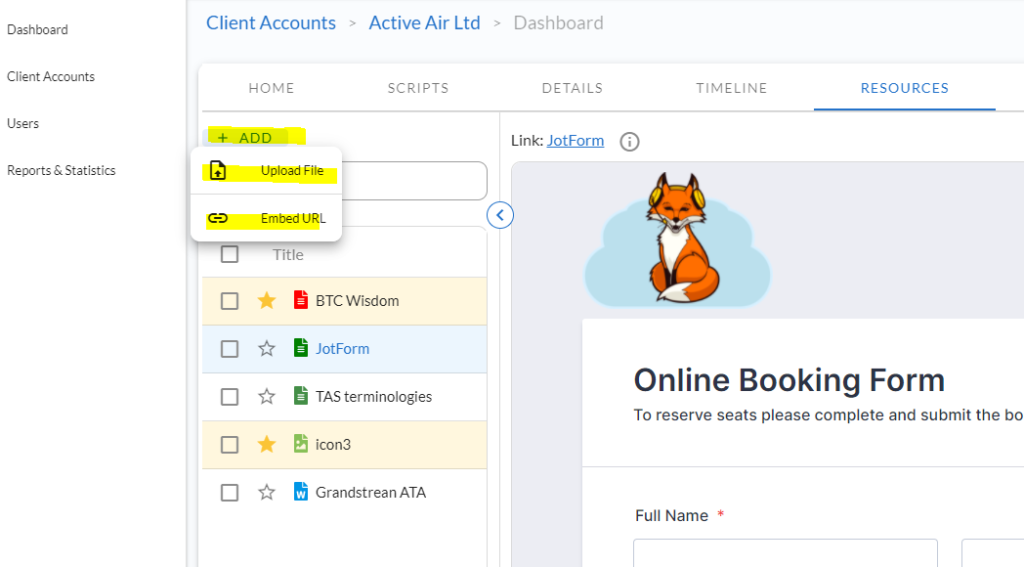
To add a new resource, navigate to the Resources tab from the Client dashboard. Then you can either upload a file or paste a website.
Note: If the website does not show up properly, you may need to contact support in order to get the domain whitelisted.
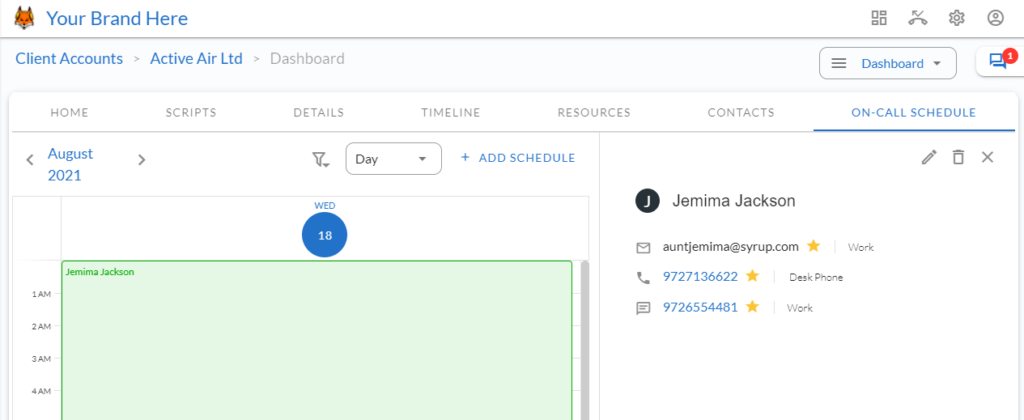
On-Call Calendar Scheduling
The On-Call Calendar can provide agents with much needed information for who is on-call at specific times for certain clients. Navigate to the On-Call Schedule tab and click the + Add Schedule link to add a new entry. Fill out the date and time, and select a contact or transfer group.
That’s concludes this tutorial on the basics of setting up a brand new client. Check out other articles for more in depth information.