The Message Template determines who the message will go to (via text or email) and what it will say.
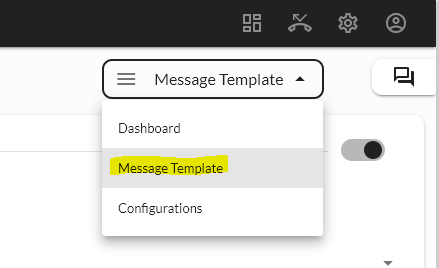
To find the Message Template, go into the client account you wish to edit, then click Message Template on the drop down menu as seen below.
Message Template Options
You’ll first see a few options at the top of the Message Template:
- Message Sending is Enabled – If you wish to DISABLE messages on this client altogether, you can toggle this to OFF.
- Auto Dispatch Message – If this is checked, it will automatically send this message after each call without any agent intervention. The agents will NOT be allowed to edit or see the messages before they are sent.
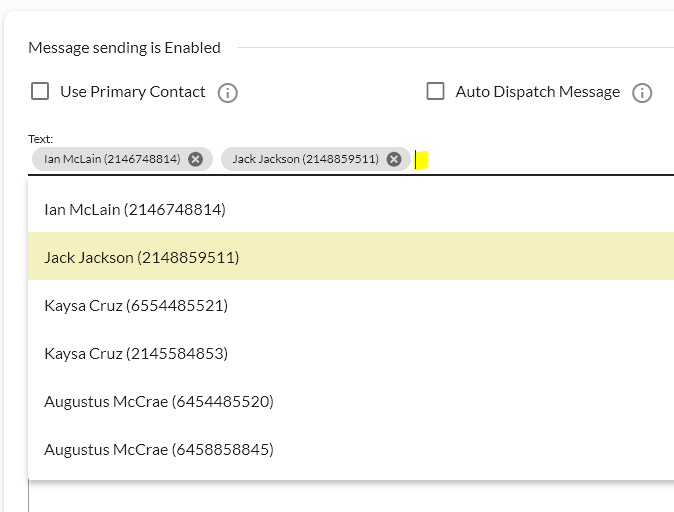
Setting Who Receives the Message
Here you’ll set who will receive the message by text or by email by default. Keep in mind that the agents can update it themselves too if necessary.
Click the line next to text or email to insert a contact here. You can also choose “on-call contacts” to have the system lookup who is on-call currently and add them to the Message.
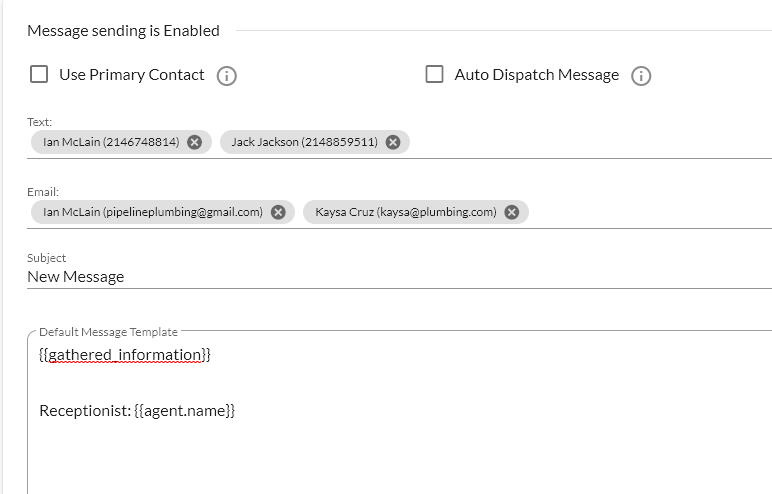
The {{gathered_information}} Tag
This tag will automatically collect all the information the agent has entered into the script and display it in an orderly fashion in the message. This saves you from having to enter each field in the Message (although you can do so if you want to customize how it’s displayed).
Using a template that looks like this, it will display all fields collected by the agent along with the agent’s name.
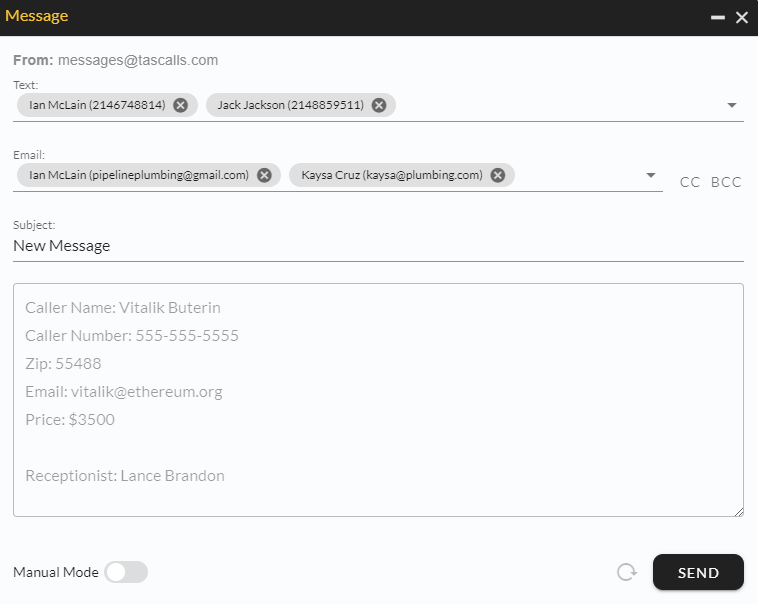
And here is how it will look assuming the agent has completed multiple fields from a script.
You can also insert fields, variables or custom text into the Message by using the icons below or simply typing the info you want included.
Did you know? You can also update the Message in each script block to customize different scenarios. For more info on that, check the Creating Dynamic Scripts tutorial.